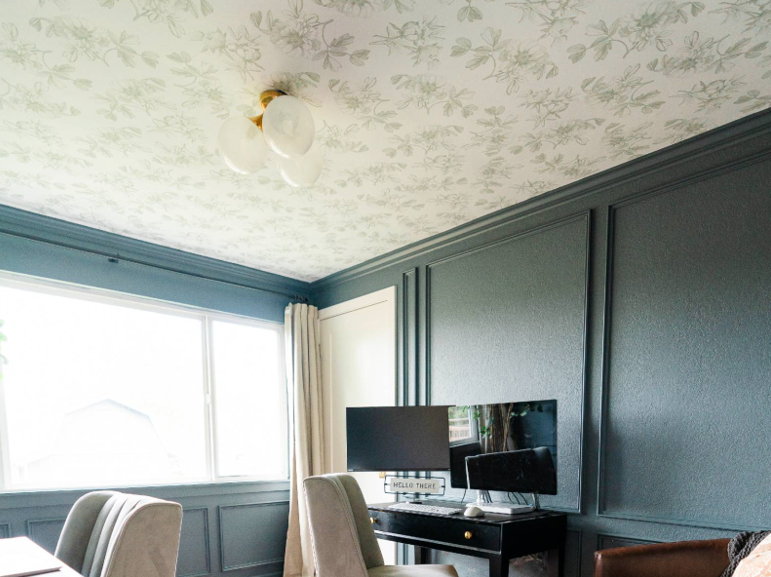
DIY Upcycled Décor Ideas
Imagine taking old, tired furniture and making it look fresh and cool again. Or using old clothes to create new and stylish outfits. Even forgotten items we find at thrift stores can become part of our daily lives in a new way.
Upcycling is like giving a cool makeover to stuff you already have, instead of buying new things. It's not just about decorating, but also about making old things useful again. We're talking about turning old furniture, clothes, and things we find in thrift stores into something awesome and useful.
In this article, we'll show you lots of fun and clever ideas for upcycling stuff. So, if you're eager to make your home more unique, environmentally friendly, and filled with character, stick around. Get ready to discover how to make the most out of what you already have!
DIY Steps for Creating Upcycled Home Decor
Getting creative with your home decor has never been so much fun! With a few simple steps, you can transform ordinary items into fantastic decorations that showcase your style and personality. Ready to give it a try? Here's what you need to do:
1. Choose Your Stuff
Look around your home for items that have seen better days or are no longer being used. Think about things like glass bottles, wooden boxes, or empty tin cans. These items are about to get a whole new lease on life!
2. Give it a Good Clean
Before you start the transformation process, make sure your chosen item is squeaky clean. Give it a good wash to remove any dust, dirt, or grime. A clean canvas is essential for your creative journey.
3. Add Your Style
Now is your moment to set your creativity free! Use paint, stickers, colored tape, or any other crafty supplies you have on hand. You can match the colors of your room or try out a totally new color scheme. This is where your creativity shines!
4. Personalize It
Make your decor truly yours by adding personal touches. Write your name, doodle a heart, or attach cool pictures from magazines that inspire you. This is your chance to make your creation one-of-a-kind.
5. Find a Spot
Once your masterpiece is ready, find the perfect spot to display it. Whether it's a shelf, your desk, or hanging on the wall, choose a place where it can grab everyone's attention. Get ready to impress with your unique and environmentally-friendly decor!"
13 Easy Upcycled Home Decor DIYs
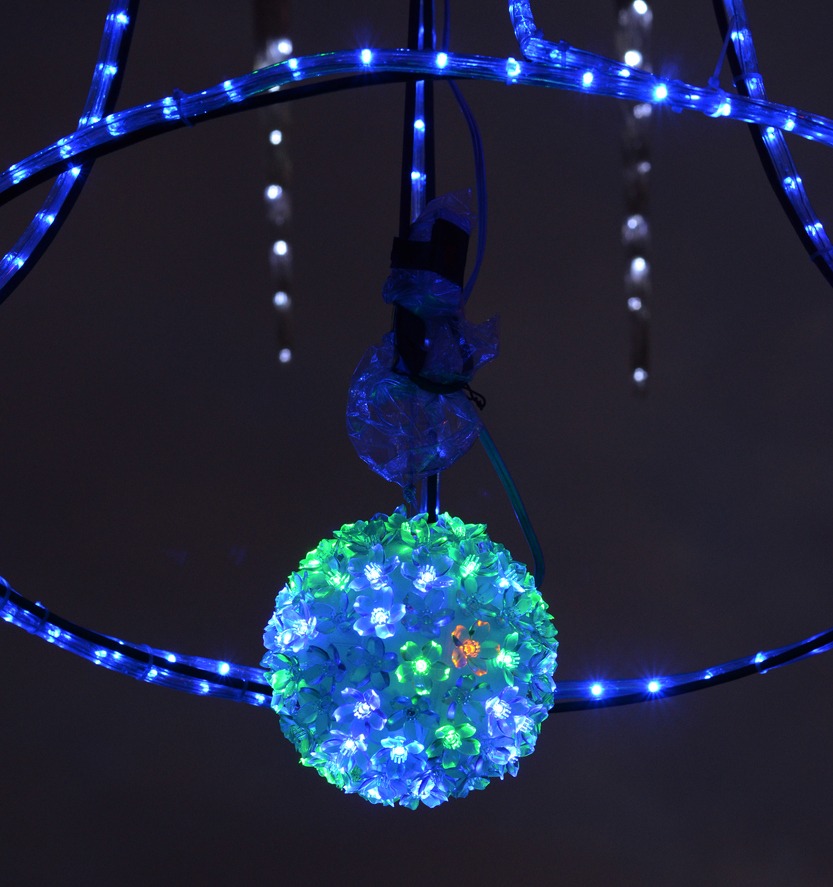
1. Outdoor Chandelier with a Hula Hoop
Create a lovely DIY chandelier for your outdoor area – it's both gorgeous and practical for your patio. A wonderful method to provide your outdoor area with a rejuvenated appearance.
Materials Needed: Hula Hoop, LED String Lights
How To Do It: Remove any extras from the hula hoop. Add LED string lights by wrapping them around the hoop for a pretty glow. Hang it in your garden, pergola, or porch securely. Switch on the lights for a charming outdoor vibe at night.
2. Vintage Pottery-Inspired from Vases
Love vintage pottery but short on pieces? Try this crafty solution: transform regular glass vases into charming "vintage pottery".
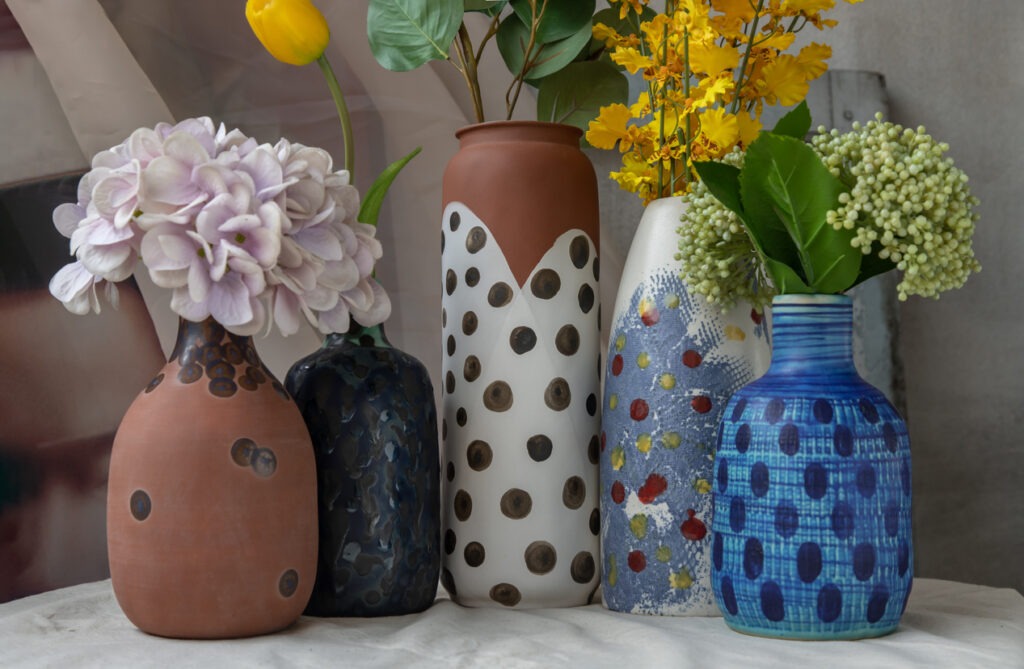
Materials Needed: Plain glass vases, paints, brushes, stencils
How To Do It: Choose plain glass vases that you want to upcycle into vintage-style pottery. Decide on the vintage pottery style you want to create. It could be rustic, antique, or any other aesthetic that appeals to you. Use different techniques like painting, distressing, or adding texture to mimic the appearance of vintage pottery. Consider adding patterns, designs, or even faux aging to give your glass vases that timeless and worn charm. Once your vases are transformed, place them around your home to enjoy the vintage pottery feel without the hefty price tag.
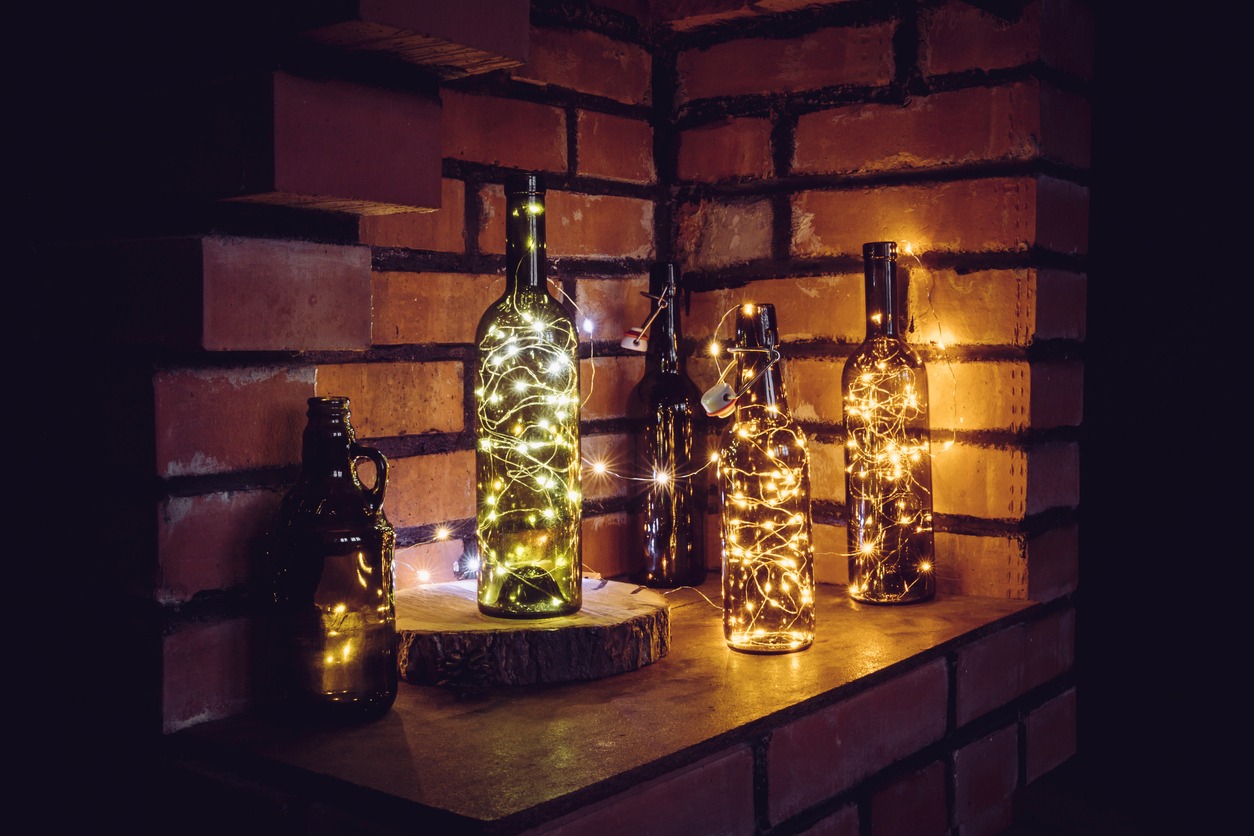
3. Wine Bottle into a Stylish Lamp
If you enjoy both wine and crafting, this project is perfect for you. By repurposing an old wine bottle, you can create a one-of-a-kind lamp that adds a touch of rustic charm to your living space.
Materials Needed: Lampshade, light bulb, used wine bottle, engraving device or drill, wiring.
How To Do It: Make sure you have an empty wine bottle, a lampshade, a light bulb, an engraving tool or drill, and the necessary wiring. Carefully use the engraving tool or drill to make a hole near the base of the wine bottle. This will be used to thread the wiring through. Thread the wiring through the hole you created in the bottle. Connect the wiring to the lamp and bulb fixture. This will allow the bottle to light up when the lamp is turned on. Place the light bulb in the bottle and put the lampshade on top. Make sure everything is securely connected. Find a spot in your home and allow the warm glow from the bottle to create a cozy ambiance.
4. Charming Vibe Farmhouse Ladder Table
If you're on the lookout for a simple and charming side table, and you're a fan of the shabby chic style, then this idea is right up your alley.

Materials Needed: Vintage ladder, paint (optional).
How To Do It: Find a vintage ladder, either from your closet or a thrift store. You can leave it as it is or give it a fresh coat of paint for a personalized touch. Place the ladder beside your sofa as a convenient side table. Alternatively, you can use it as a bedside table or even a stand for your potted plants. The choice is yours! Then, add a decorative touch to the ladder, such as placing a lamp, books, or a vase of flowers on it. This unique piece not only serves as a functional table but also adds a rustic and charming vibe to your space.
5. Chic Gallery Wall from Old Frames
Ever thought about those extra old picture frames you have? Here's a budget-friendly idea to turn them into a cool gallery wall that ties your space together.
Materials Needed: Assorted old frames, Acrylic paint in colors that match your room's style
How To Do It: Collect a variety of frames in different shapes and sizes. Don't worry if they don't match – that's the beauty of this project! Pick out acrylic paint colors that complement the vibe of your family room. This will help tie your gallery wall together. Lay down a protective surface and start painting the frames. You can paint them all the same color for a uniform look or experiment with different shades for a playful feel. Let them dry completely. Once the frames are dry, it's time to play around with the arrangement. Arrange them on the floor first to find a layout you like. Then, start hanging them on the wall using picture hooks or adhesive strips. Place your favorite photos, art, or prints into the frames. Now your gallery wall isn't just stylish but also personal!
6. Turning Old Teacups into Beautiful Candles
Have old teacups from generations past? Try this charming idea to bring them back to life – transform them into lovely candles that not only light up your space but also honor family memories.
Materials Needed: Teacup (the one you want to upcycle), Candle wax (available at craft stores), Candle wick, Old metal bowl (for melting wax), Saucepan, Scissors
How To Do It: Find an old metal bowl and place it atop a saucepan filled with water for a makeshift double boiler. Heat the metal bowl over low heat, melting the candle wax slowly and patiently. Prepare a clean, dry teacup, attach the wick, and center it in the cup. Once the wax is melted, pour it into the teacup, leaving space at the top. Let the wax cool and solidify, transforming it into a proper candle. After cooling, trim the wick leaving a few centimeters above the wax. Enjoy your charming DIY teacup candle!
7. "Cheat" Dreamcatchers from Old Doilies
Have old doilies? Try this cool DIY: make them into cute dreamcatchers for a kid's room or cozy nursery. Add ribbons for more charm, or skip for simplicity.

Materials Needed: Old doilies (the lacey fabric circles), Decorative ribbons (optional, but cute), Scissors
How To Do It: Rescue those charming old doilies for a creative makeover. Lay them out and decide on your design – layer for intricacy or go simple with one. Trim larger doilies to your preferred size if needed. Cut a small circle in the center for your dreamcatcher's focus. Add decorative ribbons to the bottom for extra charm if desired. Find a spot – hang it near a window, on a doorknob, or above your bed – and enjoy your lovely "cheat" dreamcatcher's new life!
8. Cozy Pillows from Worn T-Shirts
Is your closet stuffed with old t-shirts you hardly wear? Don't fret – those shirts can find a new purpose as cozy and sentimental pillows, adding a unique touch to your space.
Materials Needed: Old t-shirts (the ones you're ready to part with), Rotary cutter (a fancy fabric cutter), Ruler, Sewing machine, Thread
How To Do It: Gather t-shirts with special memories and repurpose them into comfy pillows. Lay a shirt flat, measure your desired pillow size, and use a rotary cutter to cut the front and back with a 1/4-inch border for sewing. Place the pieces together, design inside, and sew the sides, leaving a gap for stuffing. Invert the "pillowcase," stuff it with filling, and use a sewing machine or needle and thread to seal the gap shut. Shape the pillow neatly by folding the edges and sewing the unfinished part for a clean look. Enjoy hugging your cherished memories in cozy pillow form!
9. Toy Trucks into Charming Planters
Kids often outgrow their toys, but there's a nifty solution – repurpose those old toy trucks into cute planters! Larger trucks are ideal. Grab some sandy soil and a bit of water to start your mini garden.
Materials Needed: Old toy trucks (the larger, the better), Sandy soil (available at garden centers), Small plants like succulents or cacti, Water
How To Do It: Find those forgotten toy trucks and turn them into unique plant holders. Clean them well and ensure movable parts are secure. Fill the truck bed with sandy soil for plant support and growth space. Gently transplant plants like succulents or cacti into the bed. Give them a light watering, avoiding overwatering. Decide if you'll place the truck planters indoors or outdoors, adding charm to windowsills or shelves. Put them in spots with proper sunlight and water sparingly due to the plants' drought tolerance.
10. Old Guitar into a Stylish Shelf
Revive your neglected guitar! Make it a stylish shelf to spruce up your place. Use simple tools: a fine-toothed saw, custom glass shelves, and wooden supports. Your guitar shelf will rock!
Materials Needed: Old guitar (one you're ready to give a new purpose), Fine-toothed saw, Custom glass shelves (measured to fit), Wooden supports or brackets, Decorative items (like candles or ornaments)
How To Do It: Choose a guitar to repurpose and decide if you'll keep it intact or remove the back for a wall-mounted shelf. Plan the design and location for glass shelves. With a fine-toothed saw, carefully remove the back if needed, following the guitar's lines. Measure the inside for custom glass shelves that fit perfectly, adding modernity. Install secure wooden supports or brackets inside for shelf stability. Decorate glass shelves with small items, avoiding heavy objects. Decide on hanging or placing the shelf securely on a table or stand. Enjoy your unique guitar-inspired shelf!
11. Tool Holder from Upcycled Denim
Into painting, crafting, or sewing? Try this DIY tool holder from old jeans. It's awesome for keeping your stuff neat. Unlike regular toolboxes, it keeps your tools visible and handy. Just use old denim you've got at home.
Materials Needed: Old jeans (worn-out and ready for a new life), Sewing machine, Scissors, Thread, Optional: extra denim for pockets
How To Do It: Choose jeans to upcycle, focusing on those with unique distressed details. Decide on the holder's width – using both legs for wider or one leg for narrower. For a wider base, sew both legs together along the crotch; for narrower, cut one leg and hem the sides. Optionally, use remaining denim to add extra pockets for small tools or brushes. Fold leg(s) inside out, sew up sides, and leave top open. Turn it right-side out through the top opening, exposing pockets. Slide in tools like paintbrushes or scissors for easy access.
12. Wicker Baskets into Handy Drawer Storage
Running out of storage space? This DIY project is here to rescue you! If you're looking for a smart way to upcycle and organize, consider transforming wicker baskets into functional 'drawers' for an empty cabinet or an open table.
Materials Needed: Wicker baskets (choose the size that fits your space), Cabinet or open table (to attach the baskets), Optional: screws, brackets, or adhesive (to secure the baskets)
How To Do It: Begin by spotting areas that need more storage – hallways, bathrooms, or unused spaces. Choose wicker baskets that match your style and fit belongings. Ensure an empty cabinet or open table is strong and sized right. Attach baskets using screws, brackets, or adhesive strips based on design; balance and stability are key. You've now got storage 'drawers' that are functional and charming. Fill with gloves, hats, cosmetics, or whatever suits. For extra organization, consider labeling baskets, especially if storing different categories of items.
13. Stylish Wall Art from a Cork Board
Don't let your cork board be just a plain wall fixture – turn it into a piece of wall art!
Materials Needed: Cork board (old or new), Fabric (if you're using fabric), Mod Podge (fabric version, if using fabric), Stencil(s) of your choice, Acrylic paint and brushes, Painter's tape, Scissors, Optional: decorative elements like ribbons, buttons, or stickers
How To Do It: Start by choosing between fabric or stencil design. Clean your cork board if it's old, remove packaging if new. If you're using fabric, cut it to fit, then use Mod Podge to attach it by layering, pressing, and smoothing. For stencils, secure with painter's tape, apply acrylic paint by dabbing, and hold stencil firmly. Adding decorative elements like ribbons or buttons can boost the style. Let your creation fully dry before you move or hang it up.
Conclusion
Unlock your inner artist and reimagine your space with these inventive DIY upcycled decor ideas. From turning old toy trucks into adorable planters to transforming teacups into charming candles, these projects breathe new life into forgotten items. Repurpose doilies into dreamcatchers and jeans into tool holders, while adding a touch of vintage elegance by upcycling glass vases. Create a personalized gallery wall with discarded frames and give an old guitar a new groove as a stylish shelf. Plus, turn cherished t-shirts into cozy pillows. These imaginative projects bring eco-friendly, budget-friendly flair to your home, making sustainability and creativity your decorating allies.